


Very basic Gorilla Mux tutorial in Go
A simple tutorial on how to make a REST API with Gorilla mux package in Go in simple steps.


Introduction
Hello DEV fam, today I will be showing you how to create a basic REST API in Go language using Gorilla mux package with very simple steps, so even if your are very new to this amazing language you can follow this tutorial without any hesitation and problems. So now let's get right into it!
What are we doing today?
We will be creating a very very basic REST Api on our localhost to serve various GET POST PUT DELETE requests.
As this is going to be a beginner's tutorial to Gorilla Mux package, so we will not be looking into any of the database queries. We are going to use a sample data collection to assume it as a data coming from some database.
So without any delays let's get started.
Any Pre-Requisites?
But wait wait wait... You may ask what should I know in advance to follow this tutorial?
Hmm... Nothing fancy, just basics of Go language and that's it!
Else I will be explaining you about using & designing basic Crud REST API.
Let's see, what we will have in the end
We are going to create a simple application where,
Getting list of users in response to valid GET request at /users
Getting an user in response to valid GET request at /user/{id}
Creating an user in response to valid POST request at /user
Updating an user in response to valid PUT request at /user/{id}
Deleting an user in response to valid DELETE request at /user/{id}
The first step
Initialize your project folder by creating a folder where we will be writing our code.
So begin with following commands in your terminal.
First to create the folder and another to move into that folder
mkdir go-mux-tut
cd go-mux-tut
Now initialize the GO modules using a github repo follow up address
go mod init github.com/user_name/repo_name
Now, it's time to fetch the required Gorilla Mux module into our project using following commandmux package - The Gorilla Mux router (also known as "HTTP request multiplexer")
go get -u github.com/gorilla/mux
Now designing the Project structure
create main.go app.go model.go controller.go in the project folder
So our project structure now looks something like this:
-app.go
-controller.go
-model.go
-main.go
-go.mod
-go.sum
Now the basic setup of project is completed, let's get started with coding!
Creating a router
First starting with app.go file, create a new router variable Router using mux.NewRouter() from the mux package, for this import "github.com/gorilla/mux"
var Router = mux.NewRouter()
Now let's create a function HandleRoutes() to handle different routes serving on this Router
func HandleRoutes() {
    Router.HandleFunc("/users", GetAllUsers).Methods("GET")
    Router.HandleFunc("/user/{id}", GetUser).Methods("GET")
    Router.HandleFunc("/user", CreateUser).Methods("POST")
    Router.HandleFunc("/user/{id}", UpdateUser).Methods("PUT")
    Router.HandleFunc("/user/{id}", DeleteUser).Methods("DELETE")
}
Here using Router from the mux package, we create different routes using HandleFunc() function which takes string path and a function of http.ResponseWriter, *http.Response called controllers
We defined:
- /users path and assigned it with
GetAllUserscontroller, with methodGETto get all the users - /user/{id} path and assigned it with GetUser controller by passing id in path, with method
GETto get user with specified id - /user path and assigned it with CreateUser controller, with method
POSTto create a new user. In this we will be passing new user's data in request body - /user/{id} path and assigned it with UpdateUser controller, with method
PUTto update an existing user and we will be passing the updated data in request body - /users/{id} path and assigned it with DeleteUser controller, with method
DELETEto delete an user
The final app.go file looks like this
package main

import (
    "github.com/gorilla/mux"
)

var Router = mux.NewRouter()

func HandleRoutes() {
    Router.HandleFunc("/users", GetAllUsers).Methods("GET")
    Router.HandleFunc("/user/{id}", GetUser).Methods("GET")
    Router.HandleFunc("/user", CreateUser).Methods("POST")
    Router.HandleFunc("/user/{id}", UpdateUser).Methods("PUT")
    Router.HandleFunc("/user/{id}", DeleteUser).Methods("DELETE")
}
Creating data model
To work with Request and serving Responses, we need to first have the data.
For this we will first create the User struct
type User struct {
    ID        int    `json:"id"`
    FirstName string `json:"firstName"`
    LastName  string `json:"lastName"`
}
This User struct has an ID of type int with it's json name as id, FirstName of type string with it's json name as firstName, LastName of type string with it's json name as lastName
Now we will create a sample slice of users to work with
var UsersData = []User{
    User{1, "Stephanie", "Turner"},
    User{2, "Anna", "Edmunds"},
    User{3, "Jan", "Vaughan"},
    User{4, "Grace", "North"},
    User{5, "Piers", "Morrison"},
}
The final model.go file looks like this
package main

type User struct {
    ID        int    `json:"id"`
    FirstName string `json:"firstName"`
    LastName  string `json:"lastName"`
}

var UsersData = []User{
    User{1, "Stephanie", "Turner"},
    User{2, "Anna", "Edmunds"},
    User{3, "Jan", "Vaughan"},
    User{4, "Grace", "North"},
    User{5, "Piers", "Morrison"},
}
Creating the controllers
Now comes the important part, i.e creating the controllers which are the functions responsible for serving different paths of our simple API.
We're first required to import some packages, which are encoding/json, math/rand, net/http, strconv, github.com/gorilla/mux
Usage of each package will be explained further
import (
    "encoding/json"
    "math/rand"
    "net/http"
    "strconv"

    "github.com/gorilla/mux"
)
Starting with the simplest, GetAllUsers Function to return all users
func GetAllUsers(w http.ResponseWriter, r *http.Request) {
    w.Header().Set("Content-Type", "application/json")
    json.NewEncoder(w).Encode(UsersData)
}
Let's understand each component of this function,
we have two parameters here, w http.ResponseWriter which has a Write method which accepts a byte slice and writes the data to the connection as part of an HTTP response and r *http.Request which deals with the request stuff.
We then define the type of Data we are sending using the Content-Type parameter in response's header and setting it as application/json to send json type data
Then finally we send the response by encoding the data to json format
Now creating GetUser Function to send an user with specific id
func GetUser(w http.ResponseWriter, r *http.Request) {
    w.Header().Set("Content-Type", "application/json")

    vars := mux.Vars(r)
    paramId, _ := strconv.Atoi(vars["id"])

    for _, user := range UsersData {
        if user.ID == paramId {
            json.NewEncoder(w).Encode(user)
            return
        }
    }
}
In this, we first get the map[string]string of parameters from the request r using mux.Vars(r)
As in our case, we need the id as int type, so we then get the id from vars map and then convert it to int type using strconv package.
Then we run a loop over our UsersData and find the user with this id, then return it in response.
Working with CreateUser Function to create a new user
func CreateUser(w http.ResponseWriter, r *http.Request) {
    w.Header().Set("Conent-Type", "application/json")

    var user User
    user.ID = rand.Intn(10000)

    json.NewDecoder(r.Body).Decode(&user)
    UsersData = append(UsersData, user)

    msg := "User created successfully"
    json.NewEncoder(w).Encode(ResponseMsg{msg, user})
}
In this, we first created a new user and assigned it with a random id within a range of 10000 using math/rand package.
Then we access the data we got in request body and decode it from json format to our User struct type and store it in user variable. Then finally we store this received user into our UsersData slice.
To send a response also with message, we have created another struct called ResponseMsg , which has a message and user data to send
type ResponseMsg struct {
    Msg  string `json:"message"`
    User User   `json:"user"`
}
Then we send this response with a message of "User created successfully" and created user's data
Deleting user with DeleteUser Function
func DeleteUser(w http.ResponseWriter, r *http.Request) {
    w.Header().Set("Conent-Type", "application/json")

    vars := mux.Vars(r)
    paramId, _ := strconv.Atoi(vars["id"])

    for index, user := range UsersData {
        if user.ID == paramId {
            UsersData = append(UsersData[:index], UsersData[index+1:]...)
        }
    }

    msg := "User deleted successfully"
    json.NewEncoder(w).Encode(msg)
}
In this we have mentioned the header's Content-Type and got the id from requested path as we did earlier.
Then we ran a loop over the User's data to find the required user by comparing user's id with passed id.
When we get the required user, now we need to remove i.e delete this user from our UsersData slice.
To do so, we apply slicing using append() function by first cutting the original slice from 0th index upto that user's index , and then combining it with rest of the slice from user's index+1th position until last position.
Then finally we send a response with a message of "User deleted successfully"
Working with UpdateUser Function, to update an user
func UpdateUser(w http.ResponseWriter, r *http.Request) {
    w.Header().Set("Conent-Type", "application/json")

    vars := mux.Vars(r)
    paramId, _ := strconv.Atoi(vars["id"])

    for index, user := range UsersData {
        if user.ID == paramId {
            UsersData = append(UsersData[:index], UsersData[index+1:]...)
        }
    }

    var user User
    user.ID = paramId
    json.NewDecoder(r.Body).Decode(&user)
    UsersData = append(UsersData, user)

    msg := "User updated successfully"
    json.NewEncoder(w).Encode(ResponseMsg{msg, user})
}
This has a little complex logic... No worries, let's understand it line by line.
So first we defined the header and got the id from request path as we have done earlier.
After that we ran a loop over the UsersData to find the user with that id, and here we first delete this user using above DeleteUser's logic.
Now the old id's user is deleted, we then create a new user with that same id and then add it to the UsersData slice.
In this manner, we have successfully updated the user.
We then send a response with a message saying "User updated successfully" along with the updated user's data.
The final controller.go file look like this
package main

import (
    "encoding/json"
    "math/rand"
    "net/http"
    "strconv"

    "github.com/gorilla/mux"
)

func GetAllUsers(w http.ResponseWriter, r *http.Request) {
    w.Header().Set("Content-Type", "application/json")
    json.NewEncoder(w).Encode(UsersData)
}

func GetUser(w http.ResponseWriter, r *http.Request) {
    w.Header().Set("Content-Type", "application/json")

    vars := mux.Vars(r)
    paramId, _ := strconv.Atoi(vars["id"])

    for _, user := range UsersData {
        if user.ID == paramId {
            json.NewEncoder(w).Encode(user)
            return
        }
    }
}

type ResponseMsg struct {
    Msg  string `json:"message"`
    User User   `json:"user"`
}

func CreateUser(w http.ResponseWriter, r *http.Request) {
    w.Header().Set("Conent-Type", "application/json")

    var user User
    user.ID = rand.Intn(10000)

    json.NewDecoder(r.Body).Decode(&user)
    UsersData = append(UsersData, user)

    msg := "User created successfully"
    json.NewEncoder(w).Encode(ResponseMsg{msg, user})
}

func UpdateUser(w http.ResponseWriter, r *http.Request) {
    w.Header().Set("Conent-Type", "application/json")

    vars := mux.Vars(r)
    paramId, _ := strconv.Atoi(vars["id"])

    for index, user := range UsersData {
        if user.ID == paramId {
            UsersData = append(UsersData[:index], UsersData[index+1:]...)
        }
    }

    var user User
    user.ID = paramId
    json.NewDecoder(r.Body).Decode(&user)
    UsersData = append(UsersData, user)

    msg := "User updated successfully"
    json.NewEncoder(w).Encode(ResponseMsg{msg, user})
}

func DeleteUser(w http.ResponseWriter, r *http.Request) {
    w.Header().Set("Conent-Type", "application/json")

    vars := mux.Vars(r)
    paramId, _ := strconv.Atoi(vars["id"])

    for index, user := range UsersData {
        if user.ID == paramId {
            UsersData = append(UsersData[:index], UsersData[index+1:]...)
        }
    }

    msg := "User deleted successfully"
    json.NewEncoder(w).Encode(msg)
}
Now we have only created different components of our API, now it's time to connect all the components in main.go file
Connecting all the components and starting our API
Now we need to get the Router from app.go file and call HandleRoutes() function.
So first let's import the required packages which are fmt, log, net/http
import (
    "fmt"
    "log"
    "net/http"
)
To start the server, we need to call the ListenAndServe function from net/http package by passing the port address i.e 8000 in our case and the router which we have created in app.go file
fmt.Println("Server started on port:8000")

log.Fatal(http.ListenAndServe(":8000", r))
The main.go file looks like this
package main

import (
    "fmt"
    "log"
    "net/http"
)

func main() {
    r := Router

    HandleRoutes()

    fmt.Println("Server started on port:8000")

    log.Fatal(http.ListenAndServe(":8000", r))
}
Finally here we are, done with creating the very basic API using Gorilla Mux in Go.
Now it's time to check our API using POSTMAN.
Testing our API using Postman
To test our api we need to run our main.go file, so enter following command in terminal while being in the project folder
go run .
You will get output something like this
Server started on port:8000
Now your api server has been started on localhost at port 8000 and this can be accessed at "http://localhost:8000"
Testing on Postman
- Get all Users
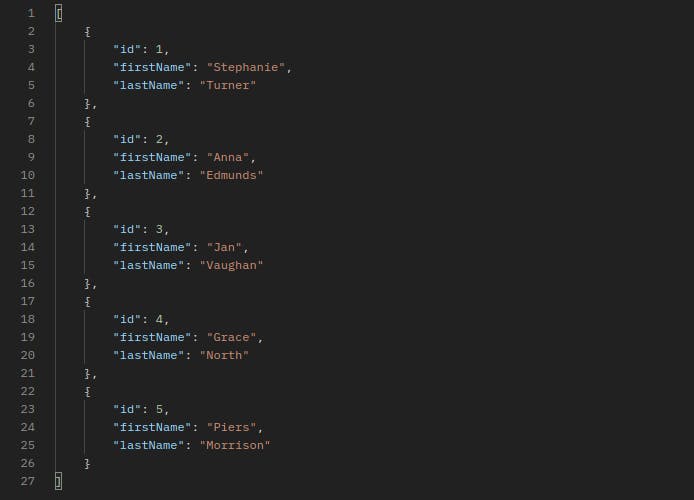
To get all the users, in Postman enter the url"localhost:8000/users"and keeping the methods asGET
We get the following response:
- Get specific User
To get a specific user, in Postman enter the url"localhost:8000/user/3"to get the user with id 3. You can user another id in place of 3.
We get the following response:

- Create User
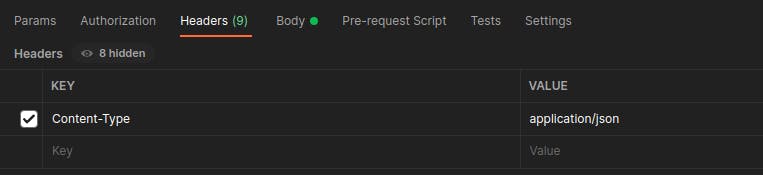
To create new user, in Postman enter the url"localhost:8000/user", then open Header tab and setContent-Typetoapplication/json
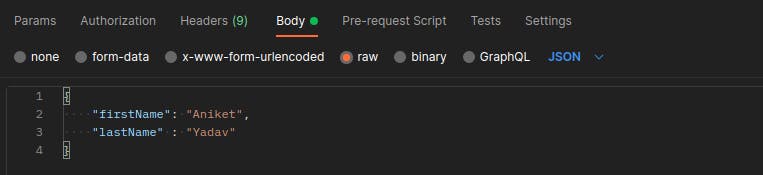
 Then create the request body from
 Body tab
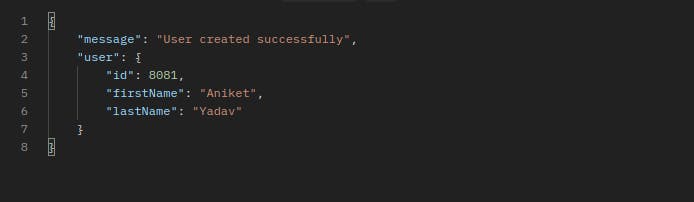
Now set the method type to POST and hit Send,
Then we get a response somthing like this:
And when you will again run get all user request, you can see the changes
- Update User
To update user, in Postman enter the url"localhost:8000/user/1"and mention the Header as done above.
Now mention the updating information in request body using Body tab:
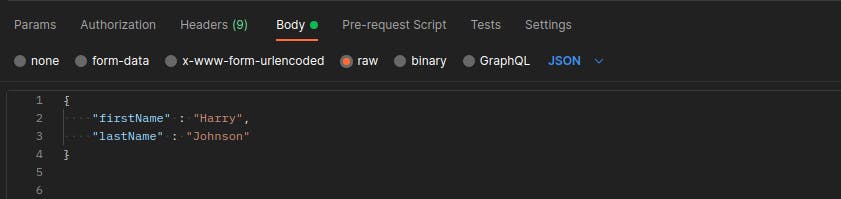
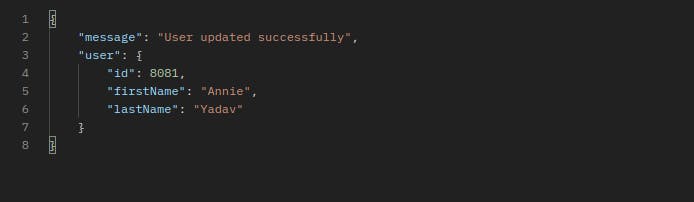
Now set the method as PUT and hit Send
So the response will look like:
- Deleting User
To delete user, in Postman enter the url"localhost:8000/user/1"by keeping the method asDELETEYou will get following response:

What we did today - Conclusion
Gorilla mux is an amazing package to work with and build APIs easily and efficiently. This was a simple example using a sample slice data. But we can use different databases like Relational SQL databases like MySQL, PostgreSQL, etc or NoSQLs like MongoDB, Redis,etc or Cloud databases like dynamoDB, etc.
Relax, no need to worry after listening all these advance techs. I will be making detailed tutorials on each just like this so stay tuned and Subscribe to our newsletter and never miss any upcoming articles and Follow me for more.
Here is the link for the Github repository of this project:
%[github.com/Aniketyadav44/go-mux-tut]
Let's Connect
LinkedIn Github Website Twitter Instagram